Most of the designs are offered not only on all the mugs Zazzle has to offer, but t-shirts and a few other gift items as well, perfect for any caffeine addict! So be sure to come and check out the entire line!
Showing posts with label items. Show all posts
Sunday, June 23, 2013
Coffee Mugs for Fun and Laughs
That's right! My latest series of designs on Zazzle has been Coffee Mugs! Most of them are of a humorous nature . . . jokes, puns, funny quotes and more. I have quite a few posted already, and I have dozens of ideas still to come. One of them is even swiftly on its way to becoming my best selling item!
Most of the designs are offered not only on all the mugs Zazzle has to offer, but t-shirts and a few other gift items as well, perfect for any caffeine addict! So be sure to come and check out the entire line!


See these and many more Coffee Mugs at Tannaidhe's Designs on Zazzle!
Most of the designs are offered not only on all the mugs Zazzle has to offer, but t-shirts and a few other gift items as well, perfect for any caffeine addict! So be sure to come and check out the entire line!
Sunday, June 9, 2013
Diversifying is Fun! (Not!)
Yep, I'm still here.
The last week has been really rough for me, culminating in a very disturbing announcement by Zazzle on Thursday, and while it's not exactly a shocking surprise, it will be cutting most of their good designers by a third or more of their income, including me. I am lucky at least in that, while it is certainly a major bummer, I was not yet to the point of paying any bills with my Zazzle income . . . this will just delay the day I can do that by a bit. Many were much harder hit, and left wondering how they will pay mortgages next month.
One thing it has done to me, however, is finally made me listen to the advice of so many other designers who were devastated after being CafePressed back in '08-'09 . . . diversify! Don't keep all your eggs in one basket, or in this case, all your designs in one POD (Print On Demand stores). I liked being able to feel like I could trust Zazzle to take care of its designers, to help me flourish with them . . . but, perhaps, this little wake up call will end up being a benefit to my financial bottom line after all. Zazzle has the best quality and range of products and best customer service of any of the PODs, but there is plenty of market for lower-end products, or niche product lines, too!
As such, I'm working to get my CafePress store in working order again (had some trouble back in December with it getting hacked, and it's been a nightmare trying to get it sorted out), and I've already signed up for two new smaller PODs, and considering several others.
My work can now be found in brand new galleries on Society6 and Skreened! Both of these stores have limited product lines (Society6 is focused on art prints, while Skreened is focused on shirts), but I have heard good things about the quality from each.


Tannaidhe's Designs on Society6


Tannaidhe's Designs on Skreened
The last week has been really rough for me, culminating in a very disturbing announcement by Zazzle on Thursday, and while it's not exactly a shocking surprise, it will be cutting most of their good designers by a third or more of their income, including me. I am lucky at least in that, while it is certainly a major bummer, I was not yet to the point of paying any bills with my Zazzle income . . . this will just delay the day I can do that by a bit. Many were much harder hit, and left wondering how they will pay mortgages next month.
One thing it has done to me, however, is finally made me listen to the advice of so many other designers who were devastated after being CafePressed back in '08-'09 . . . diversify! Don't keep all your eggs in one basket, or in this case, all your designs in one POD (Print On Demand stores). I liked being able to feel like I could trust Zazzle to take care of its designers, to help me flourish with them . . . but, perhaps, this little wake up call will end up being a benefit to my financial bottom line after all. Zazzle has the best quality and range of products and best customer service of any of the PODs, but there is plenty of market for lower-end products, or niche product lines, too!
As such, I'm working to get my CafePress store in working order again (had some trouble back in December with it getting hacked, and it's been a nightmare trying to get it sorted out), and I've already signed up for two new smaller PODs, and considering several others.
My work can now be found in brand new galleries on Society6 and Skreened! Both of these stores have limited product lines (Society6 is focused on art prints, while Skreened is focused on shirts), but I have heard good things about the quality from each.
Tuesday, May 28, 2013
Yellow Roses Split Monogram Design
This is, without contest, my favorite design in some time that I've made on Zazzle. While I love most of my work, obviously – if I didn't, I wouldn't post it – somehow this style just came together perfectly; every detail works in flawless synergy with every other. From the simple yet elegantly dignified customizable monogram center seal with its floral scrollwork accents, to the textured ribbon divider, and of course the vintage style earthtone yellow roses with their soft moss green leaves all on a warm brown background.
I am of course continuing on to my next design, and hundreds more to follow no doubt... but it will be a while before I top this one, I'm sure.


(These small images to not do the design justice; click through to see the full-size designs!)
Gold Yellow Roses on Brown with Monogram
I am of course continuing on to my next design, and hundreds more to follow no doubt... but it will be a while before I top this one, I'm sure.
Gold Yellow Roses on Brown with Monogram
Blue and Cream Roses Split Monogram Design
The second in my split floral patterns with customizable monogram - Blue and Cream Roses! Featuring elegant vintage style blue rose blossoms alongside smaller flowers, over a solid baby blue field, divided by a blue ribbon and a retro style monogram seal.


See more Blue and Cream Roses with Monogram Products
At Tannaidhe's Designs on Zazzle.com!
Sunday, May 26, 2013
Cherry Blossom on Mauve with Customizable Lace Monogram
This is the first design in a new subsection of my Split Monogram Designs. These will be featuring a lower split, to better showcase the more decorative floral designs in the upper section. With a reworked, more detailed ribbon divider, individually selected decorative monogram seals and fonts to complement each design, these designs are definitely the next step up from my basic monogram patterns to date. All in all, these new offerings will be elegant and sophisticated.


See more designs by Tannaidhe on Zazzle.com
Sunday, May 19, 2013
Been Too Long
Okay, it's been much too long since I updated this blog. I haven't been doing much "real world" crafting; I've been Zazzle designing, gardening, and raising a gorgeous new red Doberman puppy. However, given how much effort I've been putting into it, I think I will be updating this blog with all my new designs on Zazzle! And, I will try to get into other crafting again soon, as well.
The last few weeks, I've been working on (a few dozen!) customizable monogram template designs.
I have nifty modern-retro stripes designs from a couple of weeks ago:


Also, I made quite a number of damask-and-stripes designs with a ribbon and monogram seal overlay last week:


And similarly, I am currently working on designs with the same stripes and monogram ribbon and seal, but a floral swirl pattern on top:


And this is just a small selection of the color variants, each of which is available on 70+ items!
View more gifts by Jennie at Zazzle.
The last few weeks, I've been working on (a few dozen!) customizable monogram template designs.
I have nifty modern-retro stripes designs from a couple of weeks ago:
Also, I made quite a number of damask-and-stripes designs with a ribbon and monogram seal overlay last week:
And similarly, I am currently working on designs with the same stripes and monogram ribbon and seal, but a floral swirl pattern on top:
And this is just a small selection of the color variants, each of which is available on 70+ items!
View more gifts by Jennie at Zazzle.
Thursday, January 10, 2013
Single Serving Ointment Tubes
This is a fabulous idea that I wish I could take credit for. It's a bit different than most of my how to's, but it's such a good idea with so many applications, and easily done inside of five minutes, that I felt I had to share it. I literally went around my house and had everything I needed within about two minutes.
Because this was spur-of-the-moment, I only had a red straw. It would have been significantly easier if it had been a plain clear straw.
Plastic Straw (clear works best)
Needle Nose Pliers (if you have two pairs, that's even better, but not necessary)
Lighter
Simple, right?
Carefully pinch down the end of the straw to squish the ointment upwards, until you have enough empty space at the bottom for the width of your pliers plus a few millimeters.
Grip tightly with the pliers with the extra extending past them. Make sure there is no excess ointment below the pliers, as this will interfere with the sealing process.
Using the lighter, carefully heat the end of the straw extending past the pliers until it melts together. If you have a second pair of pliers, it can be helpful to pinch the melted strip while still hot to form a better seal.
Repeat at other end, either making a 'flat' or 'triangle' tube. This is the other instance when having a clear straw would make things much easier, as you try to judge where to grip the straw on the other end.
That's it!
I can think of so many uses for these! Throw a half dozen or so in your first aid kit instead of a full tube, to reduce bulk. A hiking or car emergency kit. Keep one or two in your purse or wallet for minor emergencies. And that's just with the antibiotic ointment!
You can use the same process for sealing honey straws, which makes a fabulous single-serving to add to drinks or just enjoy for a sweet snack. Single-use packets of lotion. Bad Hair Day emergency hair gel. Any fairly thick liquid, ointment, gel, etc. that you use a small portion of at a time is a perfect candidate for this method. Just remember that if you use this for more than one type of product . . . write on it what's in the tube!
Because this was spur-of-the-moment, I only had a red straw. It would have been significantly easier if it had been a plain clear straw.
Materials:
Ointment of choice (I used triple antibiotic ointment)Plastic Straw (clear works best)
Needle Nose Pliers (if you have two pairs, that's even better, but not necessary)
Lighter
Simple, right?
Instructions:
At one end of the straw, squeeze in a portion of ointment. You will probably end up wasting a bit, so put a little more than you want in your final tube. I used a little under an inch's worth of straw length. This is one way in which a clear straw would make things easier; judging how much ointment you are using.Carefully pinch down the end of the straw to squish the ointment upwards, until you have enough empty space at the bottom for the width of your pliers plus a few millimeters.
Grip tightly with the pliers with the extra extending past them. Make sure there is no excess ointment below the pliers, as this will interfere with the sealing process.
Using the lighter, carefully heat the end of the straw extending past the pliers until it melts together. If you have a second pair of pliers, it can be helpful to pinch the melted strip while still hot to form a better seal.
Repeat at other end, either making a 'flat' or 'triangle' tube. This is the other instance when having a clear straw would make things much easier, as you try to judge where to grip the straw on the other end.
That's it!
I can think of so many uses for these! Throw a half dozen or so in your first aid kit instead of a full tube, to reduce bulk. A hiking or car emergency kit. Keep one or two in your purse or wallet for minor emergencies. And that's just with the antibiotic ointment!
You can use the same process for sealing honey straws, which makes a fabulous single-serving to add to drinks or just enjoy for a sweet snack. Single-use packets of lotion. Bad Hair Day emergency hair gel. Any fairly thick liquid, ointment, gel, etc. that you use a small portion of at a time is a perfect candidate for this method. Just remember that if you use this for more than one type of product . . . write on it what's in the tube!
Saturday, December 29, 2012
Yet another Today's Best Award!
This is now four of my first nine wedding invitation designs to win a Today's Best Award! And these are all from the first day, I think. Wow! Well, I knew they were lovely and I was just delighted with them!
Once again, they chose the item with the broadest appeal/use, the address label.
Labels:
awards,
customizable,
items,
labels,
my work,
products,
return address labels,
roses,
TBA,
zazzle
Friday, December 28, 2012
Not One, Not Two, but THREE Today's Best Awards!
A few days ago, I opened a new shop on Zazzle, Tannaidhe's Wedding Boutique, to focus on invitation/stationery sets and wedding-related gifts. In my initial rush of excitement, I managed to get nine designs up in just two days (I have a good template, and an invitation set only has about a dozen items.)
Well... this morning I woke up to a bunch of emails... as the title says, I got not one, not two, but three Today's Best Awards on Zazzle. Granted, they seldom translate to much more than an ego boost, but still! Three in one day, fully a third of the designs in that shop so far! I assume they chose the address labels out of the set, because they have the widest appeal; all except the dancing couple, you'd never really know they were wedding-related without seeing the rest of the set.
So, with no further ado, my three Zazzle TBA's:
Labels:
awards,
customizable,
items,
labels,
my work,
postage,
products,
return address labels,
TBA,
zazzle
Friday, December 7, 2012
Zazzle Postage update and sale!
For those who aren't aware, the USPS postage rates are going up! They will, going forward, be $0.46. For a limited time, order postage from Zazzle at the OLD price and receive the NEW postage rate!
Browse other gifts from Jennie on Zazzle.
Monday, November 26, 2012
Cyber Monday Sale on Zazzle
It's here... Cyber Monday. Sales galore! And Zazzle is no exception. Just use the code 60ZCYBERSALE at checkout to cash in on these AMAZING deals!
60% Off Wrapped Canvases, Posters & Photo Prints
50% Off Cards, Invites, Postcards, Photocards & Ornaments
30% Off Mugs & Calendars
20% Off T-Shirts, Messenger Bags, Laptop Bags & Tote Bags
$10 Off Cases & Sleeves
And, if what you want isn't listed there...
15% Off Everything Else!
In addition, I have a few $5 off coupons for orders of $25 or more, which I would be happy to give out to those wanting to order from my shop.
View more at my store on Zazzle.
Tuesday, November 20, 2012
Today's Best Award
Although I am not as enamored of the Today's Best Award on Zazzle as I once was – for one thing, no one but other shopkeepers seem to know they are there, and for another, the designs picked are sometimes questionable at best – I really love this design and think it quite deserving of the award.
As with most of my Zazzle designs, it is, of course, available on dozens and dozens of other items as well!
Labels:
awards,
customizable,
items,
labels,
my work,
products,
return address labels,
TBA,
zazzle
Friday, November 9, 2012
Zazzle Extended Eight Hour Friday Sale
This week, Zazzle's usual Friday Four Hour Sale has been extended to eight hours! Until 8 pm pacific time tonight (November 9th). And it's a great sale selection, too – 50% Off Mugs, Canvases & Mousepads! Use code MYPHOTOGIFTS at checkout.
See more of my designs available on Zazzle.
Sunday, November 4, 2012
How-To: Easy Inexpensive Gift Plates
There are lots of easy, inexpensive treats available to make as Christmas gifts, like Super Simple No Fail Fudge.
However, that leaves the question of how to package your goodies to give them away; if you have to buy a tin or plate for every gift, this is often the most expensive part of the gift.
Not anymore!
This brilliant idea costs pennies, and allows you to adjust for any gift-giving occasion, all with supplies you probably already have in the house.
1-3 paper plates (you can even get cute ones appropriate to the occasion, or decorate them yourself)
Approx. 2 feet of ribbon
Hole punch or Xacto knife
Punch or cut a holes a quarter inch or so from the edge of your plate, about an inch to an inch and a half apart. On the plate I used, I skipped two 'ripples' in between each hole (the last one was on the next ripple to the first, but that was fine as the bow goes there.) If you will be heavily loading the plate, use two or even three together and cut through all of them at the same time so that they line up properly.
String your ribbon through the holes, alternating top and bottom. This will be easier if you pull enough through the first hole to make it all the way around and tie a bow at the end, instead of trying to pull it as you need it.
Tie a pretty bow, cut off excess ribbon, and you're done! If your gift will need to travel, wrap with cellophane and use the same ribbon to tie it shut.
However, that leaves the question of how to package your goodies to give them away; if you have to buy a tin or plate for every gift, this is often the most expensive part of the gift.
Not anymore!
This brilliant idea costs pennies, and allows you to adjust for any gift-giving occasion, all with supplies you probably already have in the house.
What You Will Need
1-3 paper plates (you can even get cute ones appropriate to the occasion, or decorate them yourself)
Approx. 2 feet of ribbon
Hole punch or Xacto knife
How To Assemble
Punch or cut a holes a quarter inch or so from the edge of your plate, about an inch to an inch and a half apart. On the plate I used, I skipped two 'ripples' in between each hole (the last one was on the next ripple to the first, but that was fine as the bow goes there.) If you will be heavily loading the plate, use two or even three together and cut through all of them at the same time so that they line up properly.
String your ribbon through the holes, alternating top and bottom. This will be easier if you pull enough through the first hole to make it all the way around and tie a bow at the end, instead of trying to pull it as you need it.
Tie a pretty bow, cut off excess ribbon, and you're done! If your gift will need to travel, wrap with cellophane and use the same ribbon to tie it shut.
Friday, November 2, 2012
How-To: Upcycled Pillow Boxes
I got the inspiration for these adorable little boxes on, I admit, Pinterest. However, while it said what they were, they included no instructions and it took me a while to figure out exactly how to do it. So, I decided to take the 'figure out' time out of it for future readers.
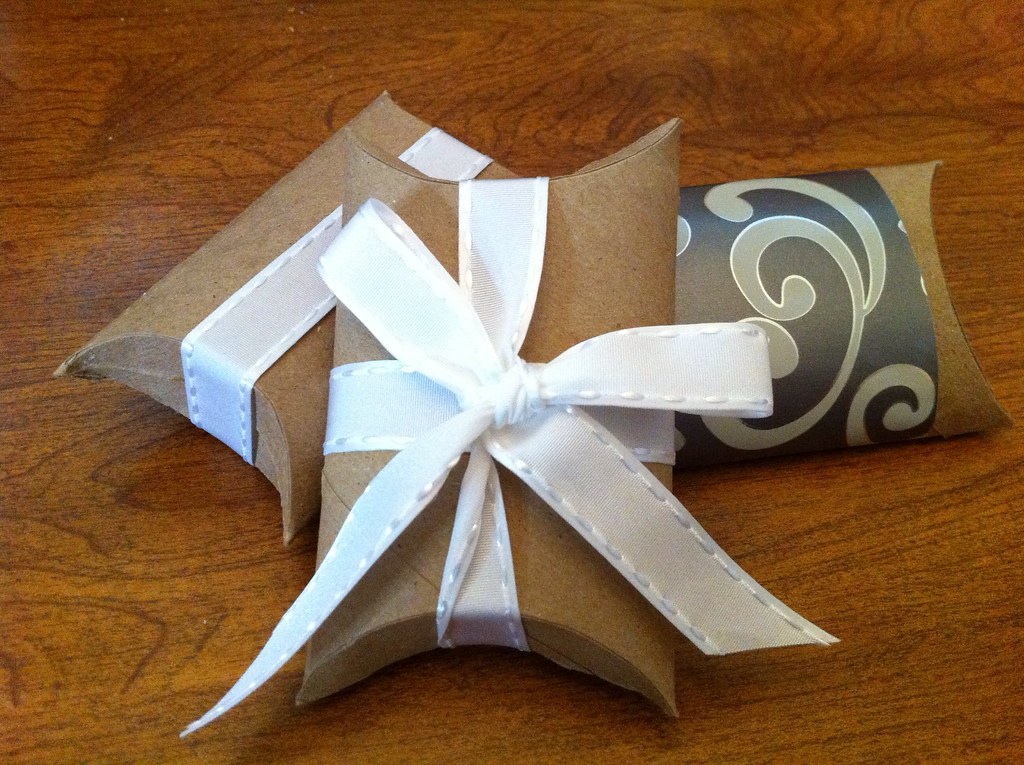
Here, then, is a step-by-step tutorial to go from – yes – toilet paper rolls, upcycled to adorable pillow boxes for small gifts. You could follow the same basic instructions with paper towel rolls, either for long boxes, or cut into pieces for 'square' boxes, or any size in between.
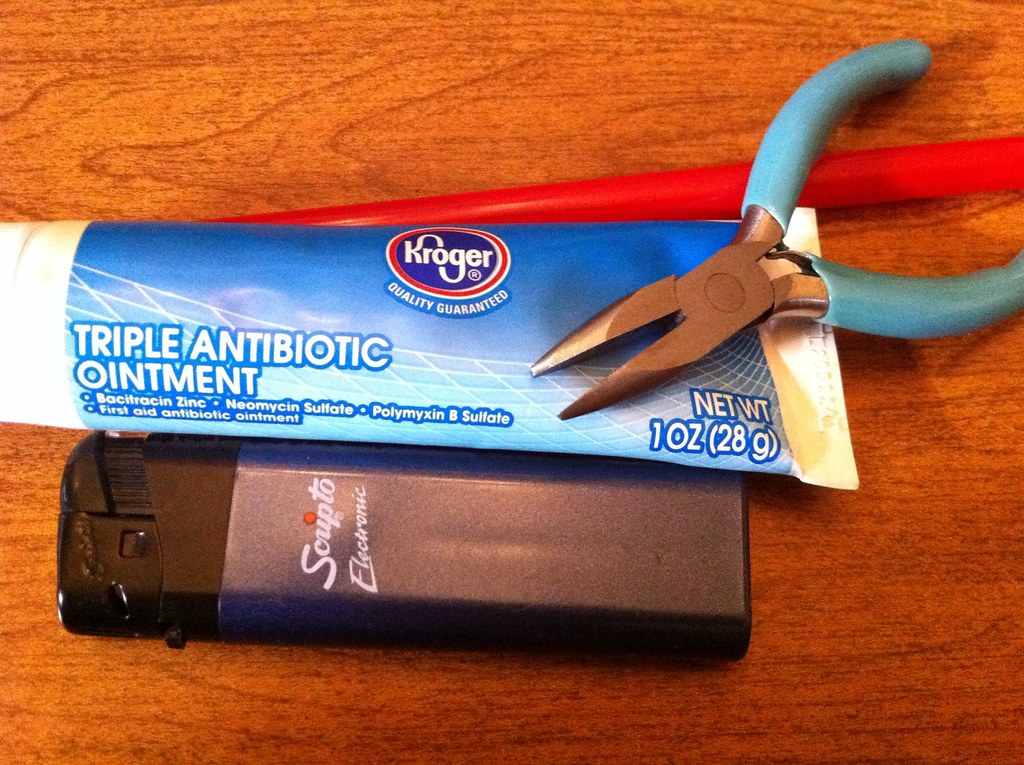
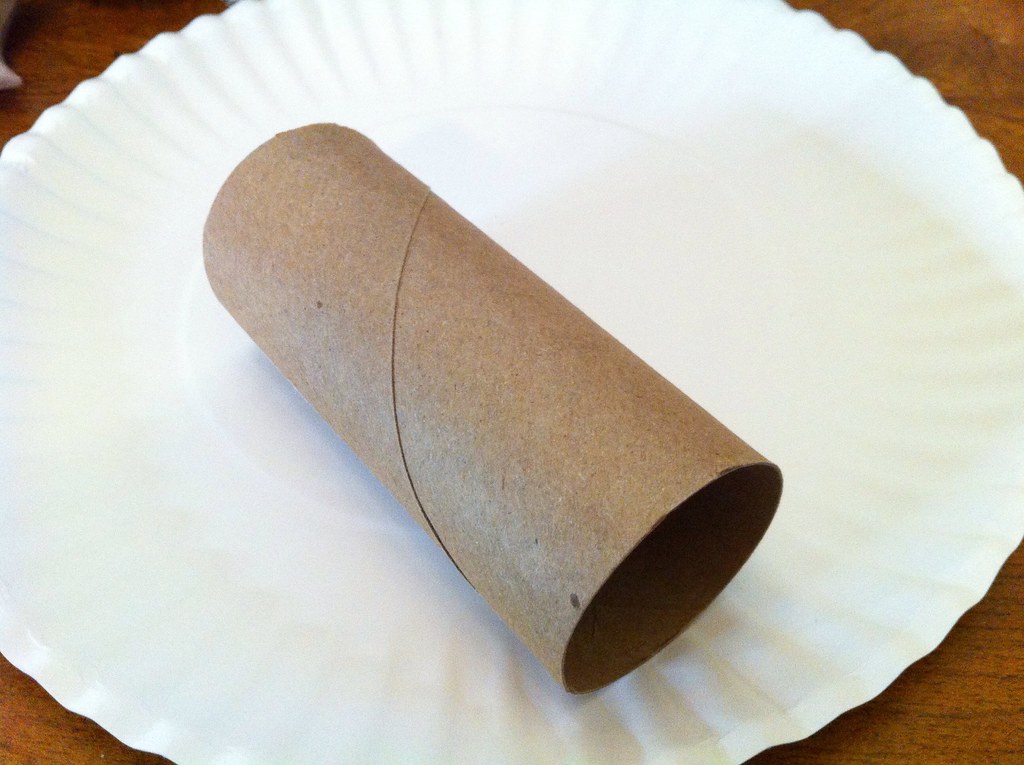
All you absolutely need is this:
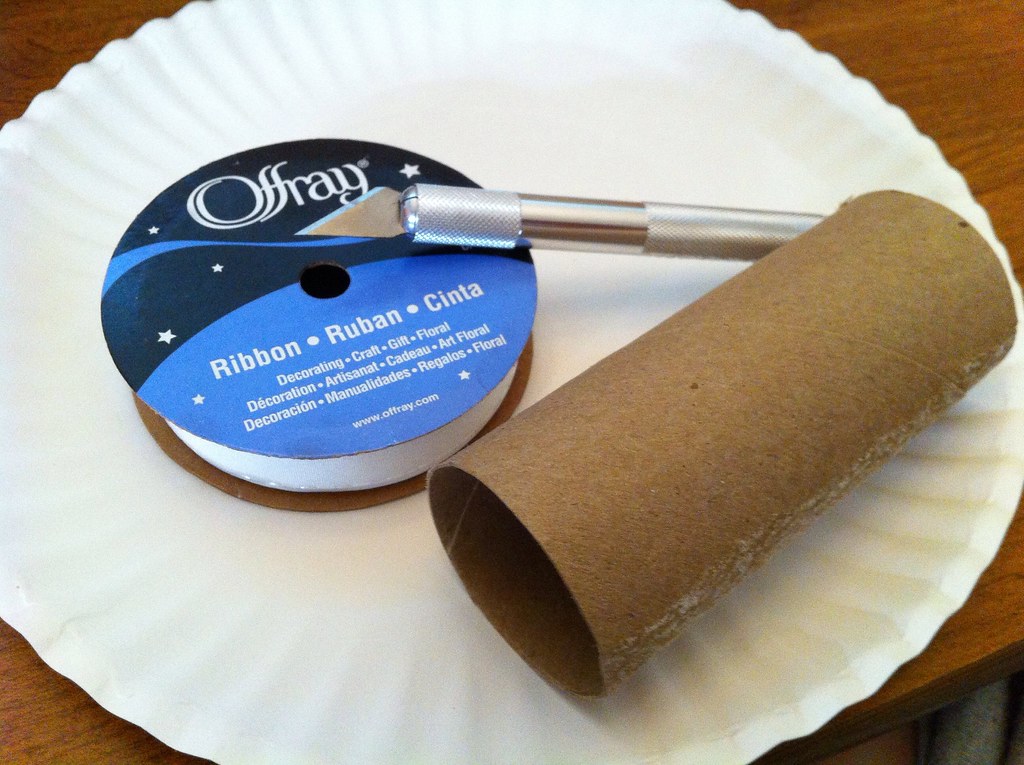
However, I I found it was much easier, and the finished product much neater, to lightly score the tubes with an exacto knife. After much searching around the house for 'the perfect circle', I found that the spool of ribbon I would be using to decorate the box with when it was finished, was the perfect size.
So, gather your materials. Easy.
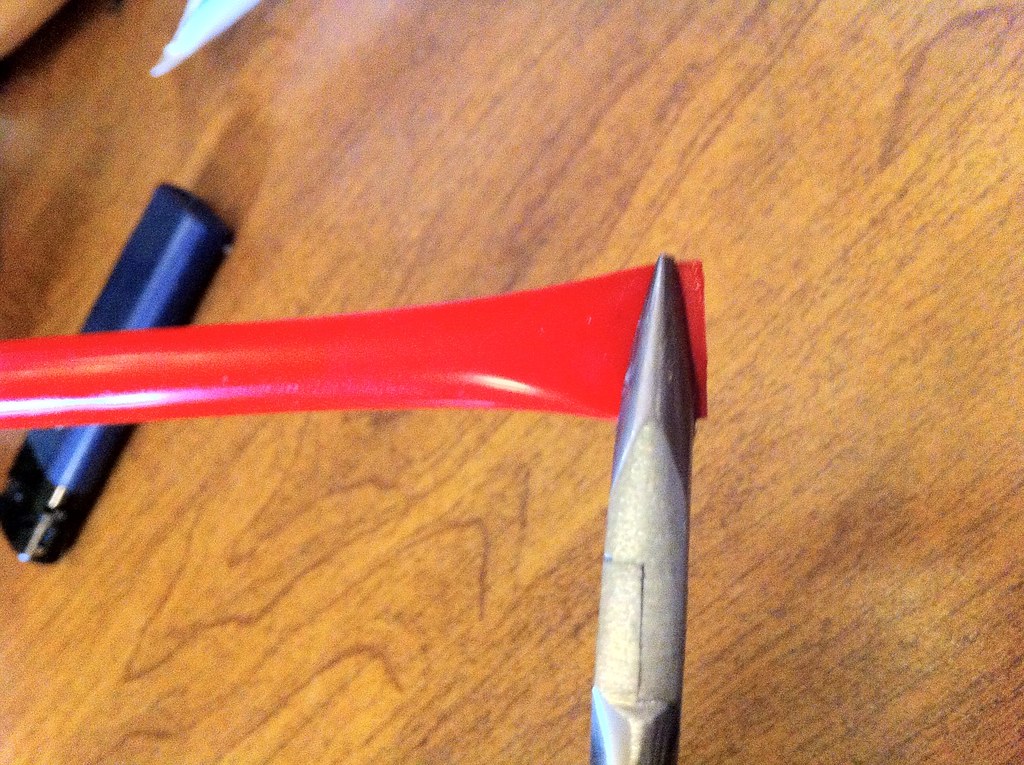
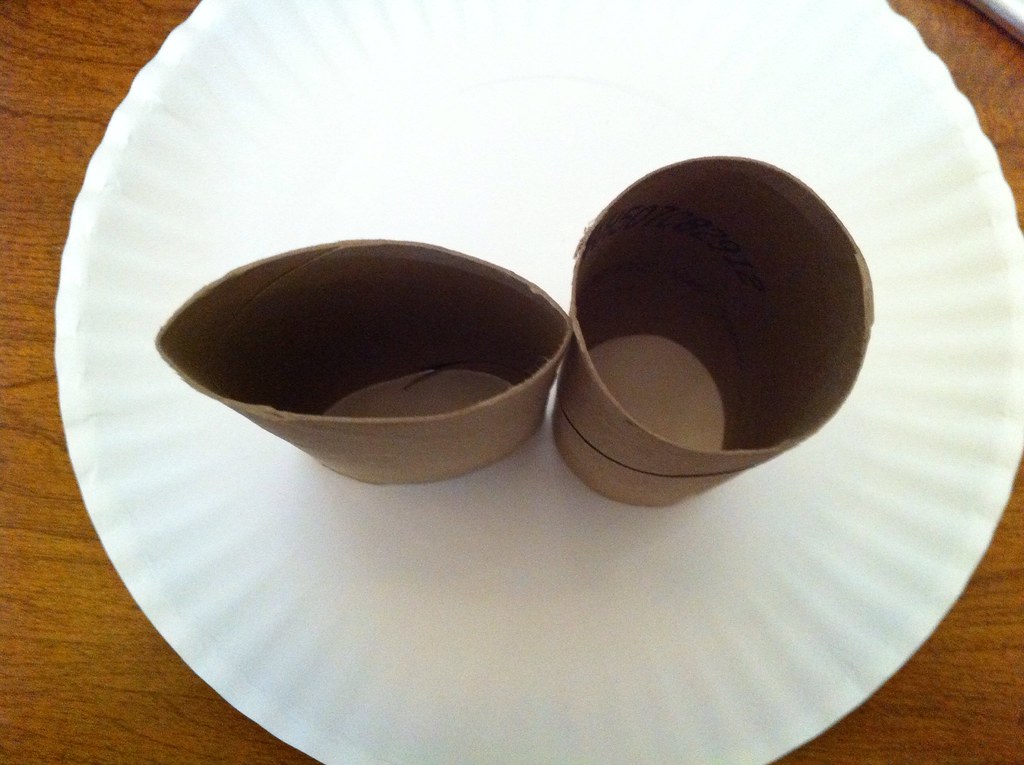
Now, squish your roll flat, but don't hard-crease the edges, so that it will pop back up partway.
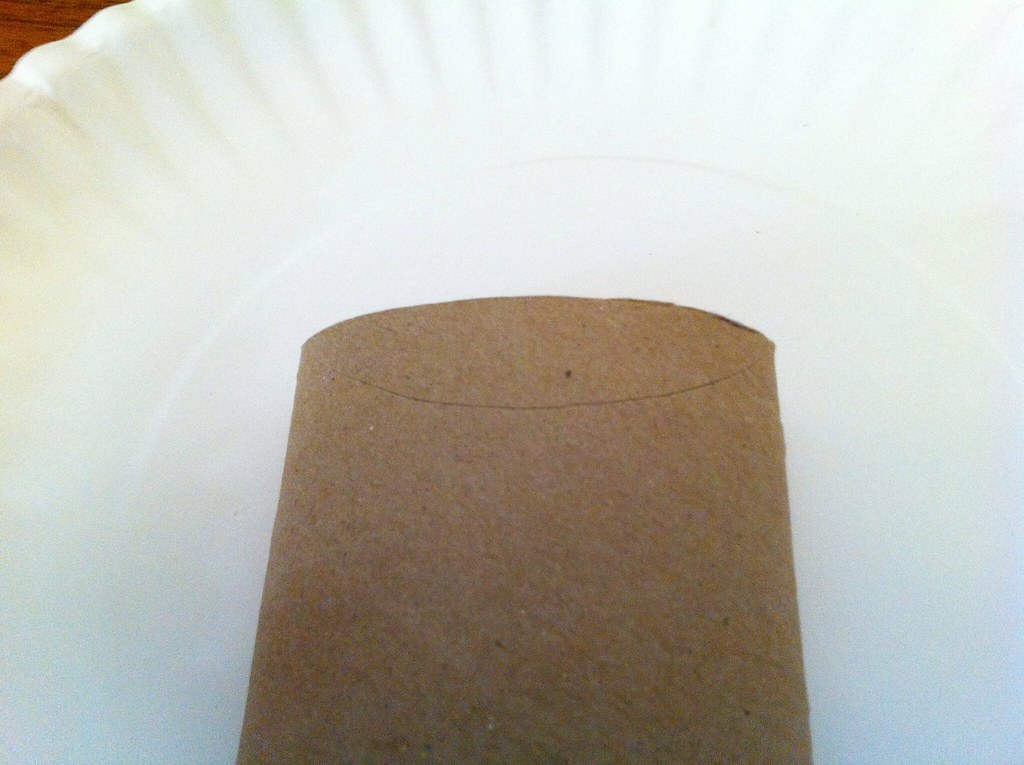
Line your circle guide at one end of the roll, so that it goes from corner to corner with the tube squished. Lightly score around the circle; keep in mind you aren't trying to cut anything, just make it easier to fold neatly.
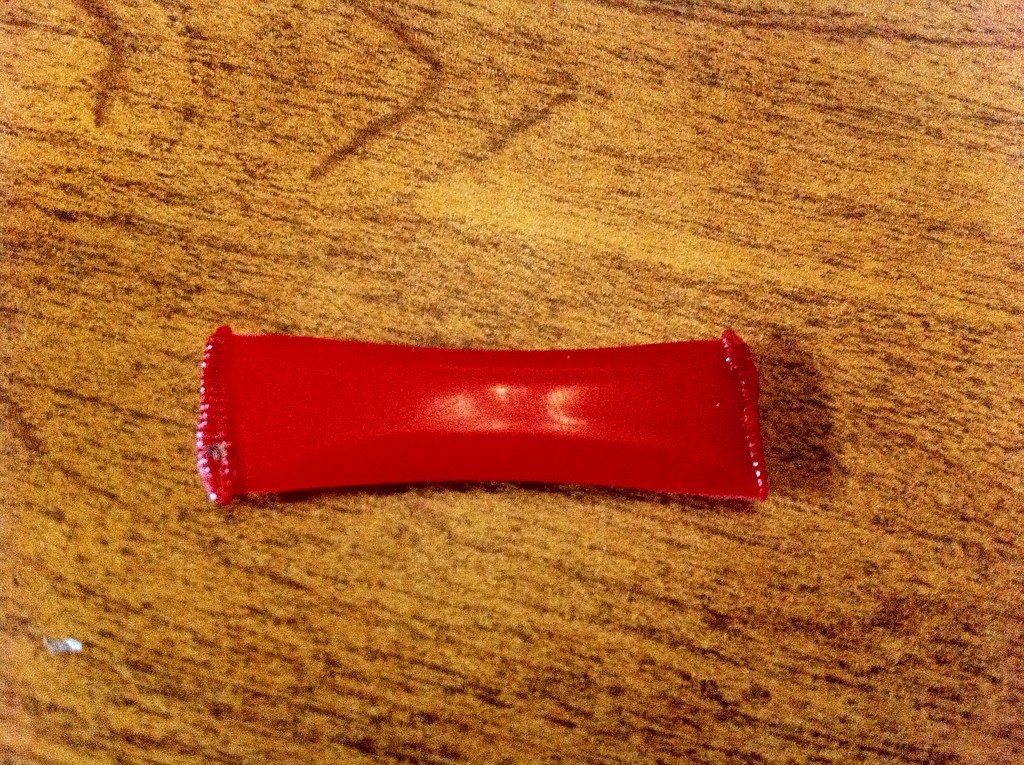
Repeat at both ends, front and back.
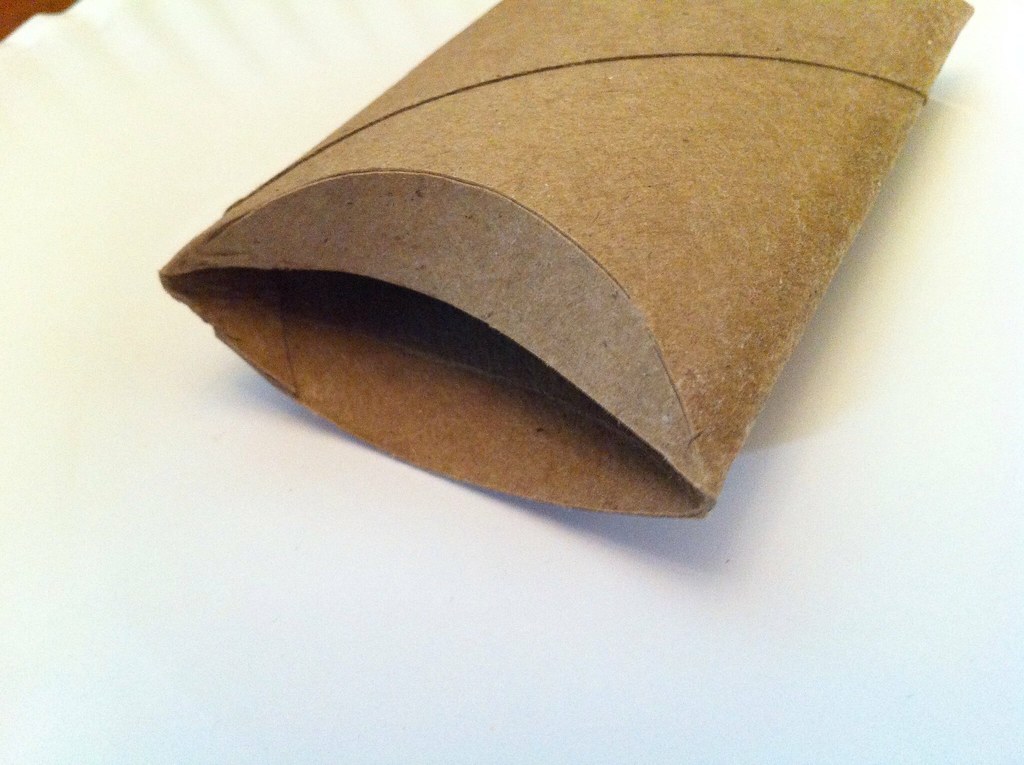
Bet you can't guess the next step, huh? Oh, wait, right... So, fold down the flap. If you have an 'ugly' side to the box, such as a glue strip, fold that side first, so that it will end up the bottom. Repeat for all four flaps, first 'front' then 'back'. You may need to squish and wiggle the little pointy corners a bit to get them lined up and shaped just right.
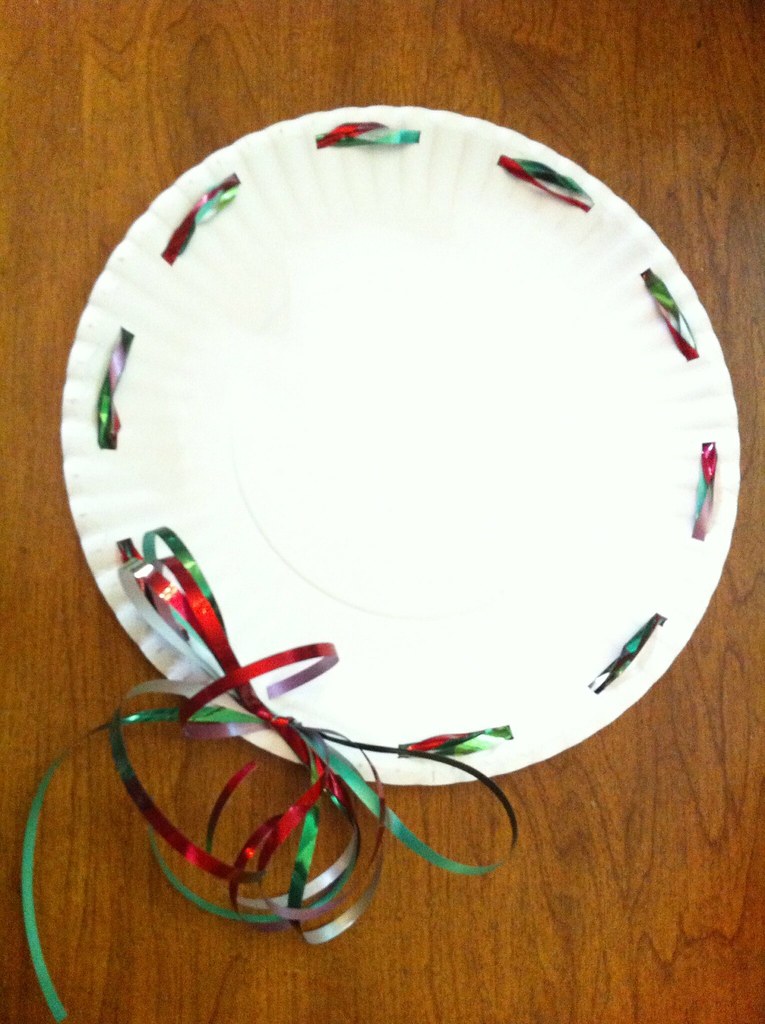
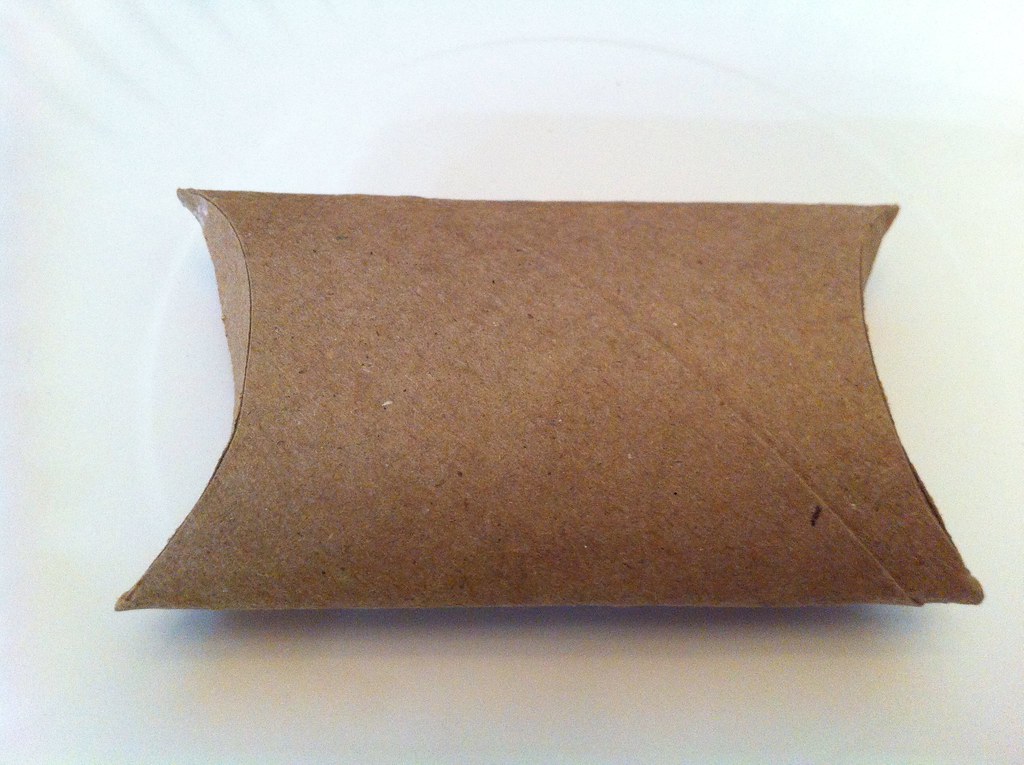
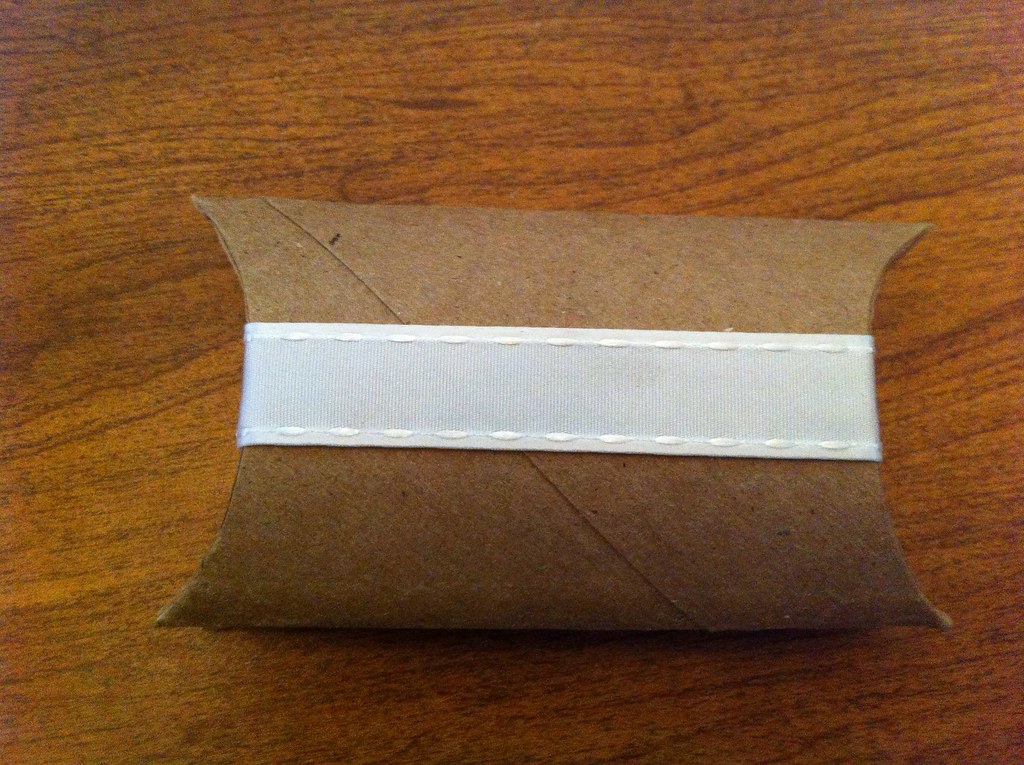
That's it! That's your basic pillow box. Decorate them, with markers or stamps or glitter.... wrap them with a little strip of wrapping paper (the huge benefit to this is you can just do it in the center, making the box complete with decoration reusable!), or just some ribbon, or a pretty bow... get creative!
Subscribe to:
Posts (Atom)